1. Discuss why online shopping is so popular with both customers and retailers.
Online shopping. We all do it; whether it be for clothes, books or electronics. I do it, my friends do it and even my parents do it. But why is it so popular amongst all the generations? Maybe because of it’s convenience. I have to admit it is very convenient as long as you know what model you want or size you are then you can get anything and everything on the net that you can get from a shop without actually leaving your house. Online shopping also allows customers to purchase things from overseas, either because they are unavailable in your home country or they are cheaper. What about our generation? The school kids on a tight budget. Some are fortunate enough to have an allowance or nice parents that buy us things. Whereas my group collaborates and orders large amounts of fandom merchandise, books and clothes and gives their money to one person, who orders all the things. This system allows us to save a lot of money in postage. So really online shopping is quick (usually), convenient and easy, making it unsurprising why it’s so popular among the generations.
2. The newspaper and publishing industry has been greatly impacted by advances in Internet technology. Explain what impact mobile Internet hardware devices (such as smartphones) and cheaper Internet access have had on newspapers and publishers.
Back in the good old days (like 10 years ago) newspapers were delivered by hand, in other words; a postie. But nowadays, we just search up the newspaper on our phone or computer, or sometimes even just a specific article. Way easier right?! It is a lot more convenient and quicker, and cheaper as it is almost free to search things up, depending on how big the file(s) are.
In my own biased opinion I would say that it is better to look at newspapers on my laptop, but I suppose there are good and bad things that come out of this modern technology. On the good side it’s cheaper and quicker for the reader and company to put their newspaper on the net. If I was a newspaper company (which I’m most certainly not!) I would prefer to put my newspaper on the net as I wouldn’t have to pay people to print it out and deliver it. It also allows more sections of the newspaper to be on the same website (like cooking, art, music, general news etc…). Companies can also upload videos to go alongside the articles on their websites, a privilege that used to be only reserved for the News companies. There would be an argument that newspaper companies have become news companies too, companies often combined the two.
However just because it’s cheaper for the reader and company doesn’t mean that it’s cheaper for the publisher and other like minded people. They publishers were paid to print the newspaper, and also due to increase in number of eBooks (I don’t mind reading articles on the net, but I will always prefer to have a tangible book in my hand) publishers aren’t in as much demand as they were. And with the paper on the net nobody requires postage and delivery of the newspapers, but they could always join the internet companies?
3. From your own experience, describe some of the limitations of search engines.
The first step to this question is to work out how search engines work. Now, there are numerous ways, but each search engine performs three basic tasks.
- They search the internet on information based on the key words
- They keep an index of the words they’ve found, and where
- They allow users to to look for words or combinations found in the index
So obviously search engines aren’t like people; you can’t have a conversation with them and, often, you can’t tell them exactly what you want. Due to this you have to be precise and clear on what you type in or you will get information that you don’t want, or irrelevant, or the annoying message that “Your search – insert search here – did not match any documents.” and provides some suggestions on what to do. Congratulations, you’ve have been beaten by a bit of software! What about when it just has endless sites that are no use?! Sometimes you just need a good book that doesn’t talk back!
4. Anyone with an Internet connection can now publish web pages. Discuss the advantages and disadvantages of this.
So far I have to two sites up on the internet, plus this blog; one for english and one for science, both on Google Sites. Its wonderful to make a website, and it’s great now that everyone with a internet connection can make a website. Usually. How do you now is the information in correct? Up to date? Isn’t just made up? Written by a thug? Ok maybe not the last one, but defiantly the first three. There are ways to overcome this concerns.
- Look at the address. If it written by someone like the government or a worldwide organisation it will be in the address (.gov stands for internet in Australia etc…)
- Look at numerous sites to check that all the information agrees on all the sites
- Proceed with caution at unprofessional sites, checking up the information on reliable sites.
Soon you will know your way around the internet like the back of your hand! But it isn’t all nasty, unreliable information. The majority of the sites and informative or entertaining. Making it possible for anyone to create their own site makes some sites like Tumblr happen. One man created this worldwide phenomena and made millions when he sold it. So, really, there are both advantages and disadvantages for the common person to create his or her own website.
Last Monday our class came up with six questions after looking at the photo below.

1) Are the Internet and the WWW the same thing?
The internet is a massive network of networks from all over the world. It connects millions of computers globally, creating a network so that any computer can connect with another, as long as they are both connected to the Internet.
The World Wide Web (WWW) is a way of accessing information over the internet. It is an information model that builds on top of the Internet. WWW uses the ‘http’ protocol and it is the only language the Internet ‘speaks’. WWW utilises browsers such as Internet Explorer, Firefox, Opera and Google Chrome.
In a nutshell, the Internet is the large container, and the Web is a part within the container.
2) Who created the Internet?
The internet that we all use today wasn’t created by a sole person, but by several people who each created a part or came up on a idea. Leonard Kleinrock is regognised as the man who came up with the idea, as he published a paper in 1961 entitled “Information Flow in Large Communication Nets”. The internet was started to be developed in the 1960s, and the first networking equipment was released in late 1969. In October 1969 the first message was sent via the Internet from Leonard Kleinrock’s laboratory.
3) Who owns the Internet?
The Internet is managed by a collaboration companies and corporations. The Internet has many branches and parts that are owned by different companies and people. So either thousands of people own the Internet or no one specifically owns the internet but there are organizations such as Gnet.
4) Who looks after the Internet?
It was really hard to find out information for this question, even finding a definite answer. The information that I was able to extract from the internet (:O mind blown!!) was that machines and companies alike look after different areas of the internet.
5) Who pays for the Internet?
Everybody who is connected to the internet pays. You pay the government for the internet and they invest in faster internet. It depends on how much internet your country needs and how fast the public want the internet. If you want to invest in quick internet the you can pay a bit more for more modern technology to provide a faster connection.
6) What is the Internet?
The Internet is a globally wide computer connection, which is a hardware used by a huge population of the world. The web can be used to find HTML pages through web browsers. The Internet is used by more than two billion people worldwide. We use the Internet find information and to communicate with others. Internet can be used as entertainment
Bibliography
The Problem: A is For Apple
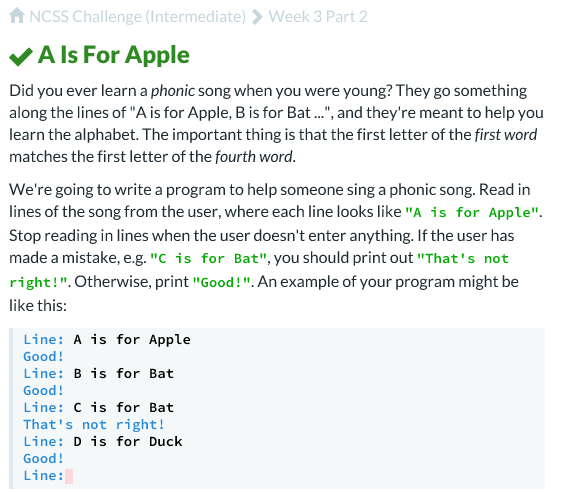
Description of Problem: This program works like the phonic song that I’m sure that we all learnt some time in our life, voluntarily or not! (I absolutely hated them). The computer asks the user to enter a line, such as “A is for Apple” or “B is for Bat”. If the first letter of the first word (in this case, a letter) is the same as the first letter of the fourth word then the program prints out “Good!” and if it doesn’t, well you really need to learn your alphabet sometime soon. Joking, it prints out “That’s not right!” (what is with that optimistic tone?!)
How to Solve the Problem:
It’s still Week 3 and Grok have just introduced us to Lists! Lists in Python store a list of values, which are separated by commas in square brackets, and contain anything from numbers to colours!
So to solve this problem I need to:
- Ask the user for a input
- Split the input into separate words (using ‘.split()’)
- If the first letter of the first word is the same as the first letter of the third word print ‘Good!’
- If it isn’t print ‘That’s not right!’
Notes Needed:
- String Method; Week 3, Part 1
- Reading in a list; Week 3, Part 2
Algorithm

My Attempts:
Attempt 1:
I thought it would be best for this problem if I went step by step, to allow me to pinpoint exactly where my errors were. So here goes….
First step was to get the input to split into separate words;

Success! 😀 Now to add the add the while loop and some if and else statements!

The if statement tells the computer if the fourth, really third since Python starts counting from 0, starts with the first word, or word zero, then it should print out ‘Good!’. If not it should print out ‘That’s not right!’
Main Source of Error:
- Some indenting issues, I must remember to make them very clear
Grok’s Solution:

Comparison of Solutions:
Our solutions are identical expect that when I spilt up my line variable I called it words, instead of keeping it the same, which I could’ve done. It was a fairly simple problem theoretically so I wasn’t expected major differences in my solution and Grok’s.
The problem: Guessing Passwords

Description of Problem: This particular program asks you to guess a password using the brute force attack, basically guessing until you get the password right. For this particular program the password is annoyingly correcthorsebatterystaple (whoever thought of that password has too much spare time on their hands! The computer will tell you ‘Wrong Password!’ in a infuriating optimistic tone and get you to guess it again until you get it right!
How to Solve the Problem:
It now being Week 3 Grok has blessed us with ‘while’ loops, which look even more fun then ‘for’ loops (just joking, just joking!)
So to solve this problem I need to:
- Set the password to ‘correcthorsebatterystaple’ (the computer probably thinks I’ve gone bonkers)
- Ask the user for an input (the password guess)
- If the input matches the set password then print ‘Password correct!’
- If the input doesn’t match the set password print ‘Wrong password!’ and ask the user to enter a new input
Notes Needed:
- Infinite loops; Week 3, Part 1 (thought this might come in handy)
- Checking a string; Week 3, Part 1
- Reading multiple lines from the user; Week 3, Part 1
- Looking for blank lines; Week 3, Part 1
Algorithm

My Attempts:
Attempt 1:

I feel really stupid right now… The problem in this program is with the second while loop. If you guess the correct password it will keep on printing ‘Password correct!’ over and over again; Congrats, I’ve just written an infinite loop. I dashed to dreams of the program to crash Google Chrome with the handy control Ctrl-C (I told you that section on notes would come in useful! :D). The error is easy to fix; replace the second while loop into a for loop. Here goes nothing…
Attempt 2:
So I changed the second while loop into a for loop….

Success!
Main Source of Error:
- The while loop, which made the program print out an infinite number of ‘Password correct!’
Grok’s Solution:

Comparison of Solutions:
Not to boast or anything, but there isn’t much to compare, although this question was fairly simple. The only difference is Grok haven’t written in the second loop and just jumped straight to the print command. Since I’ve just started Python less is not more for me and I thought that the second loop was necessary, but obviously not…
It’s that time of term again! Assessment time! Yay! These are some questions that I had to answer as part of my assessment. I might’ve gotten carried away just a bit when writing the answers, but you can never write too much! (I even wrote a bibliography!)
1. What are the differences between software engineers and programmers?
Software engineers design, develop, maintain, test and evaluate software and related applications that machines that contain software, such as computers, run. They study the needs of the users when developing and designing the software. After designing the software they instruct computer programmers to write the code for the software. Although software engineers don’t often write code, they need to be knowledgable in the area to allow them to communicate effectively with computer programmers.
A programmer is a person who writes code for computer software, but aren’t often involved in designing the software itself, that being a job for a software engineer. Computer programmers must know at least one computer programming language. The common languages used today include Ruby, Python, Java, C and C++. Programmers write, test and debug the detailed code needed for computer programs, following the instructions of a software engineer.
Once the program is written it is tested for a number of requirements;
- Reliability: How often the program’s results are correct
- Usability: The ergonomics of the program; how easy it is to use for the user of the program, including text, graphics and hardware elements
- Efficiency: How effective is the program in processing time, memory space, etc…
2. What are the roles and responsibilities of video game developers?
Video game development is the process that a game developer, whether it be a small team or a whole business, goes through when developing a game. Responsibilities for the game developer or developers include design the game play, writing rules and designing what happens in the actual game. This includes graphics and animation, character and level designs and music. There are many roles in the game development team, including;
- A designer, who designs the gameplay of the game and creating the rules and formation of the game. In larger scale productions there is often multiple designers, each with different roles, such as game mechanics (rules on how the game works), user interface (the area with the human-machine interaction), characters and levels and dialogue.
- An artist, who designs the game art, whether it be 2D or 3D
- Programmers, who are involved in programming the codebase for the game. Individual programming roles include the physics, graphics, sound, gameplay, inputs and outputs and communications with the network
- A sound engineer who works on the sound effects and positioning within the game
- Testers, who scrutinize the game, looking out for thing like software defects. They also have to make sure that the video game is playable and entertaining for the user
3. With the use of examples, explain the importance of testing software.
Software testing is the process in which testers will test the computer software, checking that the software meets its requirements, works as expected and satisfies the needs of it’s users. The testing includes an assortment of testing processors to check for errors in the software. Software testing is essential as in can lead to or cause monetary and human loss, examples of which can be seen throughout history. The most expensive loss occurred in April 1999, where a software bug caused the collapse of a $1.2 billion dollar military satellite launch. Another example of failing software is the ChinaAirlines Airbus A300, which crashed in April 1994 killing 264 people, due to a software error. As these examples prove, software testing in a vital part of software design and writing as without it, faulty software can result in the loss of millions of dollars and scores of innocent human lives.
4. Identify one place in society where computer software is used to process data. Using this example, explain broadly how the software would function (categorising your answer into inputs, processes and outputs). You do not need to write an algorithm for this.
Computer software is used in cash registers at the cash outs in shops like supermarkets and clothes shops. They are used adding up the prices of various items or item that were scanned in with a barcode, using a barcode scanner. After the customer gives the money, in cash or electronically it figures out the amount of change if needed
Inputs: Barcode, which supplies the information of price and quantity, weight of an item and the amount of money (notes, coins, electronically)
Process: Scanning if the items, summing of the total price, receives money (either cash or electronically) computation of change (if needed), communicates with a central server about bank accounts and credit if electronic money was provided and communicates with a central computer how much stock was sold. Prints out two identical receipts (one for the customer and one for the shop).
Output: Received money, given change if needed and printed out two identical receipts.
Bibliography
Software engineer. (13th September 2013). In Wikipedia, retrieved 14th September, from http://en.wikipedia.org/wiki/Software_engineer
Programer. (13th September 2013). In Wikipedia, retrieved 14th September, from http://en.wikipedia.org/wiki/Programmer
Computer programming. (12th September 2013). In Wikipedia, retrieved 14th September, from http://en.wikipedia.org/wiki/Computer_programming
Differences Between a Software Engineer and a Computer Programmer. (n.d.). In Chron, retrieved 14th September, from http://work.chron.com/differences-between-software-engineer-computer-programmer-7587.html
Video game development. (6th September 2013). In Wikipedia, retrieved 14th September, from http://en.wikipedia.org/wiki/Video_game_development#Roles
Responsibilities of Video Game Designers. (2013). In Wiki Answers, retrieved 14th September, from http://wiki.answers.com/Q/What_responsibilities_go_with_being_a_video_game_designer
Software testing. (13th September 2013). In Wikipedia, retrieved 14th September, from http://en.wikipedia.org/wiki/Software_testing
Introduction to Software Testing. (n.d). In Guru99, retrieved 14th September, from http://www.guru99.com/software-testing-introduction-importance.html


This tutorial will leave you with an adorable Yeti monster to show to all of your friends. For me, an absolutely total beginner with Adobe Illustrator (I’d never touched the thing!) this took me 3-4 hours with breaks in-between. I’ve based this tutorial of this one. Since the original tutorial is recommended for intermediate users I had to ask where the menus or items were and I’ve changed a few of the steps. For the Pen Tool, which I had no idea how to use I found this great tutorial, which was really helpful and explained how to use the Pen Tool really well.
I used Adobe Illustrator CS5 for this, but you can alter the steps to suit your version.
Making the Yeti’s Body
Step 1
Start of with a new document and size it 600 by 600 pixels. Create a square the same size as the artboard and colour it with a light blue colour (I used R=182, G=235, B=239). To change your colour settings to R, G, B (red, blue, green) from the default colour settings click on the top left button in the drop down menu and select RGB.

Using the layers panel create a new layer, call the top layer “Character” and the bottom “Background”. Lock the background layer, which stops you from accidentally doing something to the layer.

Step 2
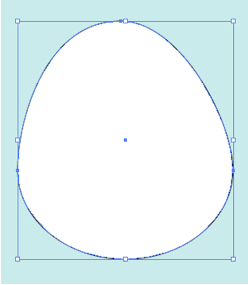
Select the “Character” layer and using the Ellipse Tool (L) click anywhere on the board. Enter the width: 290px and the height: 240px. Fill the shape with white (R=255, G=255, B=255).

Using the Direct Selection Tool (A), select the top point of the shape. Holding the SHIFT key down, drag the point approximately 80px up. Select the top point of the shape again and and drag the left handle to the left the shape looks lopsided. Select the bottom point and drag it down approximately 10px.
Step 3
To make the Yeti’s body symmetrical create a rectangle with the Rectangle Tool (M) that is larger than the body. Using the Selection Tool (V) line up the rectangle so the left edge is in centre of the body. Select both the shapes and bring up the pathfinder panel and click on Minus Front.

Select the half of the body and go to Object > Transform > Reflect. Select the vertical axis and click on copy. Drag the other half to the original half so they snap together and select both of the shapes. Click on unite in the pathfinder panel. The body should look something like this:

Step 4
Now that the body is done we can create the legs. Use the Ellipse Tool (L) to create a circle 60px wide. Drag the bottom point down approximately 45px using the Direct Selection Tool (A). This makes the bottom point quite sharp so to make it smoother move the handles a little bit to the left or right. The finished leg should look something like this:

Position the leg on the left side of the body, then copy it. Drag the copy to the right so they’re in line. Select the body and the legs and in the pathfinder panel click unite.
Step 5
To add a outline to your Yeti open the Stroke panel and enter 6 pt. Select Round Cap and Round Join. Select the shape and open the colour panel. Click on the hollow square and colour the outline with a dark brown (I used R=55, G=0, B=0).

The finished body should look something like this:

Making a Face for Your Yeti
Step 1
To make your Yeti a cute face create an ellipse 210px wide and 120px high with the Ellipse Tool (L). Colour with a dark blue colour (I used R=96, G=198, B=208). Using the Direct Selection Tool (A) drag the bottom point up about 10px. Place the ellipse in the upper half of the Yeti’s body.

Step 2
To create the Yeti’s eyes make an ellipse 30 by 30px and fill with a lighter brown than the outline (I used R=96, G=60, B=54). Select the ellipse and go to Object > Path > Offset Path. Enter -4px and click on OK. Select both of the shapes and in the Pathfinder panel click on Minus Front. With the Rectangle Tool (M) create a rectangle larger than the eye and place in over the bottom half of the shape. Select both the shapes and in the Pathfinder Panel click on Minus Front. Stroke the eye with a 3 pt weight, with Round Cap and Round Join, in the same brown colour and place over the Yeti’s face. Copy another copy and place in line on the opposite side of the face.

Step 3
When you’ve finished with the eyes it’s time to go on with the mouth. Using the Ellipse Tool (L) create an ellipse 36px wide and 38px high and fill with the same lighter brown colour. With the Rectangle Tool (M) create a larger rectangle and place it over the top half of the ellipse. Select both shapes and in the pathfinder panel click on Minus Front. To make the tongue create an ellipse of the same width and height and place it over the semi circle shape. In the Pathfinder panel click on Intersect.

Fill the tongue with a pink colour (I used R=238, G=96, B=146). Select the brown semi circle shape and outline it with 4pt Stroke Weight with Round Cap and Round Join. Select all of the shapes and Group together (CMD + G). Place the mouth in your desired place on the face

Step 4
To make the cheeks of your Yeti create an ellipse 28px wide and 14px high with the Ellipse Tool (L). Fill it in with the same colour as the tongue, place it below the left eye and copy. Drag the copy to below the right eye, making sure that they’re inline.

Making a Hairstyle for Your Yeti
Step 1
To make the hair use the Pen Tool (P) to draw out the hair with a white fill. Draw the biggest section of hair first then continue on, not ending the path. I found this tutorial really helpful. Place the hair above the face. To create a shadow for the hair copy the hair shape and colour it with a darker blue colour (I used R=66, G=146, B= 169). Move the blue hair shape down until you’re happy with it and send it backward (CMD + [). You will probably notice that the top right corner of the shadow is showing. To hide this use the Direct Selection Tool (A) and move it to the left.

Making a Tummy for Your Yeti
Step 1
To create the tummy create an ellipse 112px wide and 80px high with the Ellipse Tool (L). Colour it with the same blue as the face and outline it with the same colour with a 32pt Stroke Weight and Round Cap. Check the Dashed Line and enter 0pt in dash and 22pt in gap, which creates a scalloped edge. Place the tummy below the face.

What your Yeti needs is a belly button, right? To create one use the Line Segment Tool (/) to create a line 16px long. Outline it with 5pt, with Round Cap in the same colour as the eyes. Copy the line and paste in front (CMD + F) and rotate the copy 90 degrees. Select both of the line, Group them together (CMD + G) and rotate 45 degrees. The finalised tummy and belly button should look like this:

Making Arms for Your Yeti
Step 1
To give the Yeti arms use the Pen Tool to draw a simple curved line with a white 3pt Stroke Weight and Round Cap. With the line selected, select the Width Tool (SHIFT + W) enlarge the top point to about 26px and bottom point to about 40px. To change the arm into a shape select the line and go to Object > Path > Outline Stroke.
We will make the arm’s shadow in the same way as the hair. Colour the shadow shape in a grey colour (I used R=109, G=110, B=112) and set the Opacity to 80%. Now, we need to open the path. Using the Scissors Tool (C) cut the path at two points towards the top and delete the top portion. To stop the shadow poking out use the Direct Selection Tool (A) to move the top point down.

Step 2
Outline the arm with a 5pt Stroke Weight and Round Cap in the same lighter brown colour. Select both the arm and its shadow and Group them together (CMD + G) and place on the left side of the Yeti’s body. Select the arm and go to Object > Transform > Reflect. Choose Vertical and click on Copy. Drag the copy to the right side of the Yeti, keeping it in line with the original arm. Your Yeti with its completed arms should look something like this:

Making Some Horns for Your Yeti
Step 1
This not-so-scary monster needs some horns, yes? We can make them in the same way as we made the arms with the Pen Tool (P) and the Width Tool (SHIFT + W). Draw a curved line with a 3pt Stroke Weight and Round Cap and colour it a yellow colour (I used R=255, G=240, B=104). With the Width Tool enlarge the points until you’re happy.

Select the line and go to Object > Path > Outline Stroke, which turns it into a shape. Position the horn where you want it on the Yeti’s head (you may have to rotate it) and press CMD + SHIFT +[, which sends the horn behind everything.
Step 2
Using the Pen Tool (P) carefully draw some curved stripes on the horn in a darker yellow (I used R=242, G=212, B=66) with a 12pt Stroke Weight, making sure not to extend the lines over the horn. You find it useful is you zoom in so you can see the horn more clearly. (Then outline it with 6pt Stroke Weight in the same colour as the Yeti’s body outline (I used R=55, G=0, B=0).
Select the whole horn and go to Object > Transform > Reflect and click on Copy. Drag the other horn to the other side of the Yeti’s head. Your Yeti’s horns are now complete!

Giving Your Yeti Some Blue Feet and a Shadow
Step 1
Use the Pen Tool (P) to carefully draw a shape that fits in the lower half of the Yeti’s leg in the same colour as the face and tummy. Then make three small equal ellipses with the Ellipse Tool (L) in the same blue colour. Make sure that you can fit three on top of the shape you just drew. Group (CMD + G) the ellipses together and select both them and the shape. Bring up the Pathfinder panel and click on Minus Front. Copy the shape and drag it across to the other leg.

Step 2
To create a shadow for your Yeti use the Ellipse Tool (L) to make an ellipse 250px wide and 28px high. Fill it with the same colour as you used for the arms.

Step 3
Last, but not least it’s time to make your Yeti a home! Yetis live in mountains, right? Before doing anything lock the “Character Layer”, unlock the “Background Layer” and select the “Background Layer”. To create a triangle select the Star Tool and click anywhere on the board. Enter 10px in Radius 1 and 20px in Radius 2 and 3 points. Fill the triangle with a pale blue colour (I used R= 235, G=251, B=252) rotate is 180 degrees. Duplicate and arrange to form “mountains”. Lastly change the colours to create a Gradient Effect.
Your Yeti is now complete!

You can also duplicate the file and erase the background to create an icon for folders and documents!

I hope you have enjoyed this tutorial and I look forward to seeing you next time! ^.^
As you all know for IST I was doing a video entitled “Five Days in the life of an Minecraftian”. Although I would have loved to finish this project and see the final result the double period in which I was planning to film was taken up with a school ceremony. Instead of making this video I will be working on a texture pack on Photoshop with a friend. It was a tough decision to make as I had done a lot of preparation for the video and had even done a few shots worth of footage.
So for my IST project this term I have done a Yeti on Adobe Illustrator and I will be uploading a tutorial for it later on. I am also going to be dabbling in a bit of google sketch-up later on, designing a room or a simple Minecraft style house.
So me and my teacher have an agreement. Since I am using iMovie for my video “Five Days in the Life of a Minecraftian” and since I rated myself intermediate in iMovie, I have to include some techniques in the video. I did some research on a few of these techniques and this is what I came up with.
Green Screen
What is it and how to use it?
- Exactly what it sounds, a green screen that is placed behind the subject being filmed or photographed
- A green screen can be either green of blue, because they are the only two colours in your skin tones. If you were to use a colour like yellow or red it will distort the image as the computer picks up that particular colour all throughout the image
What are its uses?
- The main purpose a green screen is to replace the green background with a different images without changing locations
- The computer can pick up on all of the green pixels in the image and replace them with the desired background
Disadvantages?
- The green screen does have to be green or blue otherwise you will find yourself with a magical disappearing outfit!
Camera Angles
There are multiple camera angles, which are important for creating meaning for the video.
- Birds Eye View – Looks directly down upon a character or setting. This angle is often paired with extreme long shot to establish setting
- High Angle – This angle looks down upon the subject. The subjects look small and vulnerable and the viewer feels powerful
- Eye Level – Is a neutral angle and puts the audience on equal height with the characters. This angle is popular in movies and films as it puts the audience at ease with the characters
- Low Angle – Is the opposite of a high angle shot as it looks up at the character. This makes the character on screen look fierce and powerful and the audience feel vulnerable
Camera Shots
There are several different types of camera shots, which all create different feelings and emotions for the audience.
- Extreme Long Shot – This shot contains a lot of landscape and is used to establish setting, usually at the beginning of the scene
- Long Shot – Still contains landscape, but this shot gives the audience more specific detail about the setting
- Full Shot – This shot show the full view of the characters and allows the audience to become more familiar with them
- Mid Shot – Shows the character from the waist up. The audience are able to see the character’s face more clearly
- Close-up Shot – This shot only shows one character’s face, allowing the audience to creates a intense mood or feeling.
So, as you see, there are lot of different techniques that I can use in my video. I plan to use and the camera angles and shots to manipulate my viewers…hehe >:)
I will be doing my storyboard this week and I will film this weekend. I plan to use some photo manipulation (photoshop hehe ^.^) so the video can count as two types of Digital Media. If that idea turns out to be too hard I will do my photoshop unit separately. My story board will be up by next weekend, so expect some progress on that part. I would like to have my video if I do the photo manipulation in 3 weeks but if there is no photo manipulation I would have it up in 2 weeks.
So long ^.^
Fridays. The last day of the school week. But why is Friday such a good day? Is it because its the last day of the week? Or is it because of the classes (why english, why?!! ^.^)? Or maybe because of the anticipation of the week IST double? Which ever reason the word Friday always brings an exited murmur throughout the class. For me Friday is a great day for all of the previous reasons. And maybe because Saturday is the next day. And Saturday means horse riding.
Now onto the topic of blogging. Now that I’ve got into the swing of things, I’ve found that blogging is easier than I first thought. If you scroll down you will see some very halfhearted attempts of blogs. When you try to blog like that, it just doesn’t work. You have bite the bullet and dive right into the spirit of things. And blogging isn’t just writing random stuff that happened during the day. Well…it is for some people. But this blog is an academic blog and that means that I have to blog about things that happened during the lesson. Reflect. I hate that word, don’t you? I mean, what does it mean to reflect? What counts as reflecting? All of those holiday essays that we had to write during primary school put me off reflecting forever. Blogging isn’t about reflecting, it’s about looking back on what you have done, keeping track of your work and most of all writing down ideas!
Today I started to work on what I wanted to do in my video “Five Days in the Life of a Minecraftian” (Yes I choose that one ^.^). Ms Gunja helped my start off with my ideas and what I wanted to film.
The things that I want to represent through my video are:
- That the online world is more similar to the “real” world than we realise
- The online world is real and the “real” world is just a distraction
Things that I want to film:
- Humans doing Minecraft “things”
- Such as eating/cooking, killing animals for food, fighting monsters, building and collecting resources (mining, chopping down wood)
The main idea that I came up with is that the young people are living a Minecraftian life in the real world. They go to school to learn about survival skills (mentioned above) instead of academic subjects. Also if I’m feeling adventurous I will replace some things in the real world footage with their Minecraft relative. These include a furnace instead of a oven, a Minecraft tree instead of a real life tree etc…
Time Plan
- Collect short clips from Minecraft
- Draw up a storyboard
- Plan shots/footage
- Editing in iMovie and Photoshop
Questions involving filming?
Where will I film? I am planning to film all the outdoor shots/footage at my five acre property in the lower Blue Mountains. The indoor shots will all be filmed in my current house.
How long will filming take? If I work hard with filming they can be done by the end of the next weekend, leaving me the rest of the term to edit everything and put anything together.
That is all for now, but expect a blog about advanced iMovie techniques (homework..hehe ^.^)
Ella
